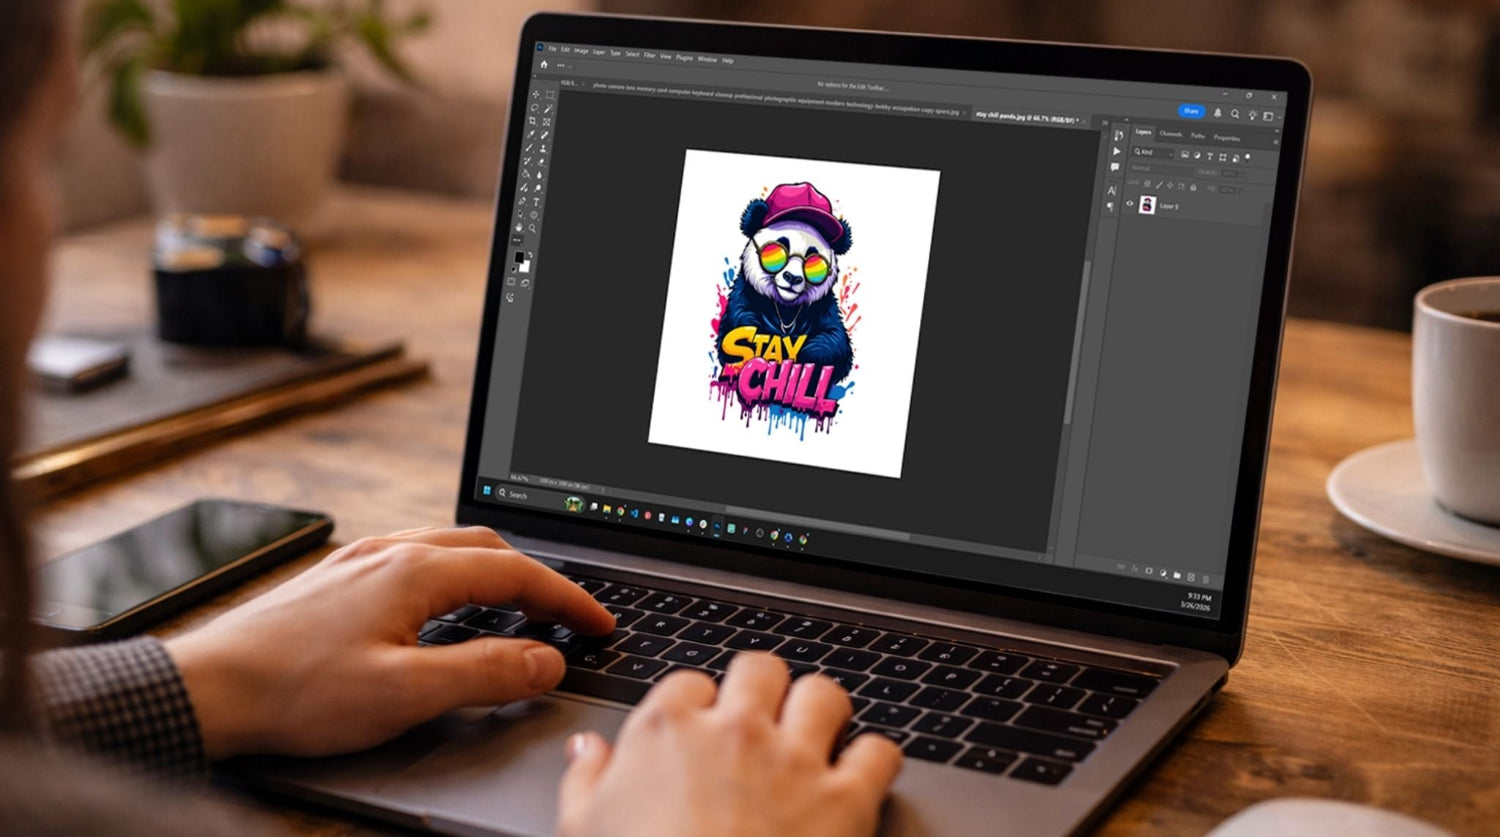
Perfect edges can make the difference between amateur-looking transfers and professional-quality custom apparel that customers love. When you're preparing designs for DTF transfers, edge quality directly impacts how your finished products look and perform.
Whether you're creating single custom pieces or preparing bulk orders, mastering edge refinement in Photoshop ensures your DTF transfers look crisp, professional, and ready for any fabric. This comprehensive guide walks you through every technique you need to create flawless edges that translate into stunning finished products.
Why Edge Quality Makes or Breaks DTF Transfers
The Impact of Poor Edges on Your Final Products
Visual Quality Issues:
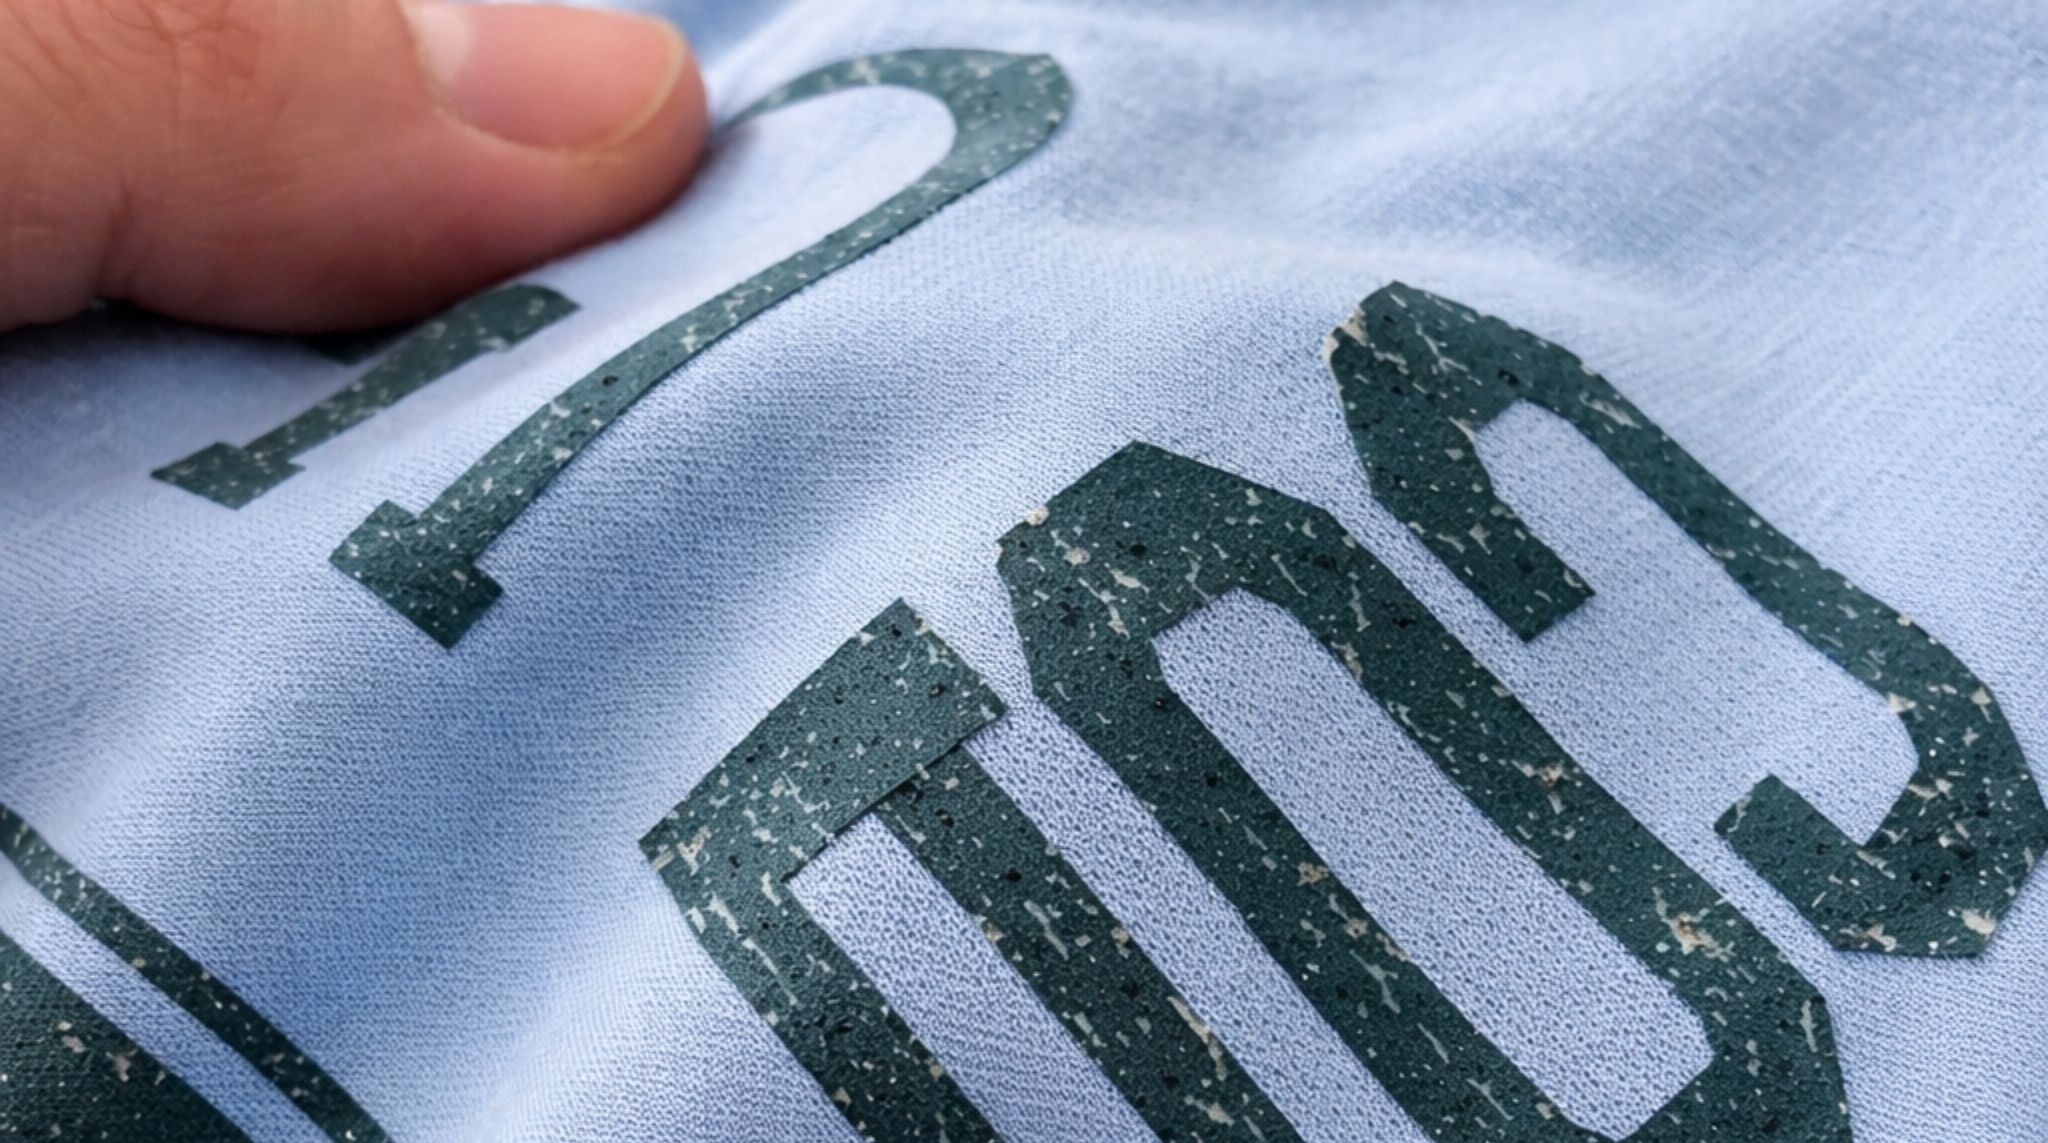
- Jagged, pixelated edges that look unprofessional and cheap
- White halos around designs that create obvious transfer boundaries
- Blurry outlines that make text and graphics appear fuzzy
- Color bleeding that muddies design clarity and impact
Application Problems:
- Uneven adhesion where rough edges don't bond properly to fabric
- Premature peeling at poorly defined edge areas
- Visible transfer film remnants around imperfect cuts
- Inconsistent results across multiple pieces
Business Consequences:
- Customer complaints and returns due to quality issues
- Difficulty charging premium prices for subpar-looking products
- Lost repeat business from disappointed customers
- Wasted time and materials on failed transfers
Professional Edge Benefits
When you master edge refinement, your DTF transfers deliver:
- Sharp, Clean Lines: Crisp boundaries that define your designs perfectly
- Seamless Integration: Edges that blend naturally with fabric texture
- Enhanced Durability: Better adhesion and longer-lasting transfers
- Premium Appearance: Professional quality that commands higher prices
Essential Photoshop Tools for Edge Perfection
Selection Tools for Precise Edge Control
Pen Tool: Your most powerful weapon for creating perfect vector paths around complex shapes. Offers complete control over every curve and corner for professional results.
Quick Selection Tool: Ideal for rapid selections of well-defined areas with clean color separation. Works excellently for removing backgrounds quickly.
Magic Wand Tool: Perfect for selecting uniform color areas with consistent lighting. Adjust tolerance settings for optimal edge capture.
Color Range: Advanced selection method for isolating specific colors while maintaining edge detail throughout the selection process.
Refinement Tools for Edge Enhancement
Select and Mask Workspace: Photoshop's most sophisticated edge refinement environment, offering real-time preview and adjustment capabilities.
Layer Masks: Non-destructive editing approach that preserves original image data while allowing unlimited edge adjustments.
Refine Edge Brush: Intelligent tool that analyzes edge characteristics and applies appropriate refinement automatically.
Channel Operations: Advanced technique using color channel information to create precise selections based on contrast data.
Finishing Tools for Professional Polish
Defringe Command: A specialized tool for removing color halos and edge contamination from selections.
Blur and Sharpen Filters: Fine-tune edge softness and definition for optimal transfer performance.
Stroke and Border Effects: Add subtle definition to delicate edges that might otherwise appear weak.
Step-by-Step Edge Refinement Process
Step 1: Start with Optimal Image Quality
Resolution Requirements:
- Begin with images at 300 DPI minimum for your final print size
- Higher resolution allows for better edge detail preservation during editing
- Vector graphics provide unlimited scalability without edge degradation
- Avoid upscaling low-resolution images, which creates artificial pixelation
Image Quality Assessment:
- Open your design in Photoshop and check Image > Image Size
- Verify pixel dimensions meet your final output requirements
- Examine edges at 100% view to identify potential problem areas
- Consider recreating text or simple graphics as vectors for perfect scalability
Step 2: Create Clean Background Separation
Background Removal Strategy:
- Simple Backgrounds: Use Magic Wand Tool with appropriate tolerance settings
- Complex Backgrounds: Employ the Quick Selection Tool with edge refinement
- Detailed Edges: Switch to Pen Tool for maximum precision and control
- Hair/Fur Details: Utilize Select and Mask with Refine Edge Brush
Professional Separation Techniques:
- Work at high magnification (200-400%) for accuracy
- Make multiple selections and combine using Shift+Click for additions
- Use Alt+Click to subtract areas from existing selections
- Create selections slightly inside actual edges, then expand for clean results
Step 3: Master the Select and Mask Workspace
Accessing Advanced Controls:
- Make your initial selection using any selection tool
- Click "Select and Mask" in the options bar or use Select > Select and Mask
- Choose appropriate view mode for your background (Overlay, Black, or White)
- Adjust view opacity for optimal edge visibility
Key Adjustment Parameters:
Smooth Slider (0-100): Reduces jagged edges and creates flowing curves
- Use 1-3 for geometric shapes
- Apply 3-8 for organic shapes and photos
- Higher values for artistic, stylized effects
Feather Slider (0-250 pixels): Controls edge softness
- 0.5-1 pixel for sharp, defined edges
- 1-3 pixels for natural photo edges
- Higher values for artistic blending effects
Contrast Slider (-100 to +100): Sharpens or softens edge transitions
- Positive values create harder edges
- Negative values create softer, more natural transitions
- Adjust based on your design style requirements
Shift Edge Slider (-100 to +100): Expands or contracts selection boundaries
- Negative values shrink selection, eliminating halos
- Positive values expand selection to include more edge detail
- Fine-tune to eliminate color contamination
Step 4: Eliminate Color Halos and Contamination
Understanding Halo Formation: Color halos occur when background colors mix with subject edges during selection or when compression artifacts create false color information around design boundaries.
Defringe Techniques:
- Select your design layer
- Go to Layer > Matting > Defringe
- Set the width to 1-2 pixels for most situations
- Preview results and adjust if necessary
Advanced Halo Removal:
- Use Layer > Matting > Remove Black Matte for dark halos
- Apply Layer > Matting > Remove White Matte for light halos
- Create custom masks to paint out stubborn color contamination manually
- Use the Clone Stamp tool on a separate layer for precise color correction
Step 5: Optimize Edge Sharpness and Definition
Sharpening Strategy for DTF:
- Duplicate your design layer for non-destructive editing
- Apply Filter > Sharpen > Unsharp Mask with conservative settings:
- Amount: 50-150%
- Radius: 0.5-1.5 pixels
- Threshold: 0-5 levels
- Use layer mask to apply sharpening only to edge areas
- Blend the sharpened layer using the Luminosity blend mode to avoid color shifts
Selective Edge Enhancement:
- Create edge-specific layer masks using high-pass filtering
- Apply sharpening only where needed using brush tools
- Use different sharpening amounts for different edge types
- Preview at 100% zoom to verify optimal sharpening levels
Step 6: Add Subtle Edge Definition When Needed
Strategic Stroke Application:
- Right-click the design layer and choose Blending Options
- Select Stroke and configure:
- Size: 1-2 pixels maximum
- Position: Outside for most applications
- Blend Mode: Normal or Multiply
- Color: Slightly darker than design edge colors
Alternative Definition Methods:
- Create subtle drop shadows for depth without heaviness
- Use inner glow effects for designs on dark backgrounds
- Apply gradient overlays for enhanced edge contrast
- Combine multiple subtle effects for complex edge enhancement
Advanced Edge Refinement Techniques
Channel-Based Selection Methods
Leveraging Color Channel Information:
- Open Channels panel and examine individual color channels
- Identify the channel with highest contrast between subject and background
- Duplicate high-contrast channel and enhance using Levels adjustment
- Use enhanced channel as basis for precise selection creation
- Load channel as selection and refine using Select and Mask
Benefits of Channel-Based Approaches:
- Creates selections based on actual image contrast data
- Produces more natural edge transitions than manual selections
- Excellent for complex subjects with varying edge characteristics
- Maintains fine detail that other methods might eliminate
Hair and Fine Detail Edge Handling
Refine Edge Brush Technique:
- Enter Select and Mask workspace with initial selection
- Select Refine Edge Brush from toolbar
- Paint over areas with fine detail like hair, fur, or fabric texture
- Use small brush sizes for precise control
- Adjust edge detection radius for optimal detail capture
Multiple Selection Strategy:
- Create separate selections for different edge types within same design
- Apply different refinement settings to each selection type
- Combine refined selections using layer mask painting
- Fine-tune composite result for overall edge harmony
Batch Processing for Consistent Results
Action Creation for Repeated Tasks:
- Record common edge refinement steps as Photoshop Action
- Include selection methods, refinement settings, and output parameters
- Test action on various image types for reliability
- Modify action based on most common edge challenges
Automated Workflow Benefits:
- Ensures consistent edge quality across multiple designs
- Saves significant time on repetitive refinement tasks
- Reduces human error in complex refinement sequences
- Allows focus on creative aspects rather than technical processing
Color Management for Perfect Edge Reproduction
Color Space Considerations for DTF
Working Color Space Setup:
- Set Photoshop working space to Adobe RGB or sRGB depending on your workflow
- Maintain consistent color space throughout editing process
- Convert to appropriate output color space only at final export stage
- Use soft proofing to preview color appearance on target materials
Edge Color Accuracy:
- Monitor edge color reproduction under different lighting conditions
- Adjust edge colors for optimal visibility on intended fabric colors
- Consider color interaction between design elements and fabric
- Test edge color performance through actual transfer applications
Preventing Color Bleeding at Edges
Color Separation Techniques:
- Create slight gaps between contrasting color areas
- Use neutral transition zones for problematic color combinations
- Apply trapping techniques borrowed from traditional printing
- Test color interactions with actual transfer materials
Edge Contrast Optimization:
- Enhance contrast specifically at design boundaries
- Use complementary colors to strengthen edge definition
- Apply subtle color adjustments to improve edge visibility
- Balance color vibrancy with edge clarity requirements
Quality Control and Testing Procedures
Digital Quality Assessment
Zoom and Inspection Protocol:
- View designs at 100% zoom to check actual pixel-level quality
- Examine edges at 200-400% zoom for detailed inspection
- Check edge consistency throughout entire design perimeter
- Verify edge quality on different background colors
Mock-up Testing:
- Place designs on various fabric color backgrounds digitally
- Test edge visibility under different contrast conditions
- Simulate lighting conditions of intended use environment
- Verify readability and impact at intended viewing distances
Physical Testing Recommendations
Sample Transfer Creation:
- Create small test transfers of edge-critical designs
- Apply to actual fabric samples under normal conditions
- Evaluate edge quality after application and initial wash
- Document successful edge parameters for future reference
Edge Performance Evaluation:
- Assess adhesion quality specifically at edge boundaries
- Check for lifting, peeling, or separation at refined edges
- Evaluate edge durability through multiple wash cycles
- Compare edge performance across different fabric types
Troubleshooting Common Edge Problems
Pixelated Edge Solutions
Root Cause Analysis:
- Insufficient original image resolution
- Excessive sharpening or contrast adjustments
- Inappropriate selection methods for image type
- Scaling artifacts from size adjustments
Correction Strategies:
- Return to higher resolution source material when possible
- Use vector recreations for geometric shapes and text
- Apply subtle blur followed by careful sharpening
- Utilize edge-preserving filters like Surface Blur
White Halo Elimination
Comprehensive Halo Removal:
- Apply Layer > Matting > Defringe with 1-2 pixel width
- Use Shift Edge slider in Select and Mask to contract selection
- Paint out halos manually using Clone Stamp or Healing Brush
- Create custom masks to isolate and correct halo areas
Prevention Strategies:
- Make initial selections slightly inside subject boundaries
- Use higher contrast selection methods when possible
- Avoid excessive feathering on high-contrast edges
- Work with larger source images to minimize compression artifacts
Uneven Edge Thickness Issues
Consistency Enhancement:
- Examine Pen Tool paths for irregular anchor point spacing
- Recreate problematic path segments with consistent curve handling
- Use Stroke Path option for perfectly even line weights
- Apply consistent refinement settings across entire edge perimeter
Optimizing Workflow for Production Efficiency
Template Creation for Consistent Results
Master Template Development:
- Create base templates with optimal edge settings for common design types
- Include appropriate color spaces, resolution, and refinement parameters
- Document successful settings for different edge challenges
- Maintain template library for quick project startup
Workflow Standardization:
- Establish consistent naming conventions for edge work files
- Create standardized folder structures for edge refinement projects
- Develop quality checklists for edge evaluation
- Train team members on consistent edge refinement procedures
Time Management Strategies
Efficient Process Sequencing:
- Complete all rough selections before detailed refinement
- Batch similar edge refinement tasks together
- Use automated actions for repetitive refinement steps
- Reserve manual fine-tuning for most critical edge areas
Quality vs. Speed Balance:
- Identify designs requiring premium edge treatment
- Develop faster methods for less critical edge work
- Use appropriate tools for each edge complexity level
- Focus detailed work on customer-visible edge areas
Your Path to Edge Mastery
Perfect edges in Photoshop transform ordinary designs into professional DTF transfers that stand out in the competitive custom apparel market. The techniques covered in this guide provide the foundation for creating consistently excellent edge quality that enhances your reputation and justifies premium pricing.
Key Success Principles
Technical Excellence: Master the tools and techniques that deliver consistent, professional results every time.
Quality Focus: Never compromise on edge quality - it's often the difference between amateur and professional appearance.
Systematic Approach: Develop repeatable processes that ensure consistent results across all your projects.
Continuous Improvement: Keep refining your techniques based on real-world transfer performance and customer feedback.
Building Your Edge Refinement Expertise
Practice Strategy:
- Start with simpler designs to master basic techniques
- Gradually tackle more complex edge challenges
- Document your successful approaches for future reference
- Build a library of solved edge problems for quick reference
Professional Development:
- Study edge work in professional design examples
- Experiment with new Photoshop features as they're released
- Share knowledge with other designers to learn alternative approaches
- Stay current with DTF technology developments that affect edge requirements
The investment in mastering edge refinement pays dividends in customer satisfaction, reduced rework, and the ability to command premium prices for consistently professional results. Every hour spent perfecting your edge techniques returns multiple hours saved in production and customer service.
Ready to create DTF transfers with flawless, professional edges? Florida DTF Factory provides high-quality transfer materials that showcase your perfect edge work beautifully. Our transfers are designed to work seamlessly with properly prepared designs, ensuring your edge refinement efforts translate into stunning finished products that exceed customer expectations.
Leave a comment
This site is protected by hCaptcha and the hCaptcha Privacy Policy and Terms of Service apply.