Creating custom t-shirts at home has become the perfect creative outlet and business opportunity for countless crafters and entrepreneurs. Whether you're designing personalized gifts, building inventory for your online store, or exploring a rewarding hobby, home t-shirt customization offers unlimited creative possibilities without the overhead of commercial equipment.
With quality transfer materials and the right application techniques, you can produce professional-looking custom apparel from your craft room or kitchen table. This comprehensive guide walks you through every method and technique, helping you choose the perfect approach for your needs, budget, and creative goals.
Why Make Custom T-Shirts at Home?
Creative Freedom and Personal Expression
Unlimited Design Possibilities: Bring any vision to life without compromise or minimum order requirements from commercial printers.
Instant Gratification: Transform ideas into wearable art in just minutes, not weeks.
Perfect Personalization: Create truly unique gifts that show genuine thoughtfulness and care.
Complete Control: Oversee every detail to ensure results meet your exact standards.
Financial and Business Benefits
Low Startup Investment: Begin creating custom apparel with basic equipment under $200 rather than thousands for commercial setups.
No Minimum Orders: Make single shirts or small batches without waste or excess inventory.
Higher Profit Margins: Keep all profits instead of paying markups to printing services.
Market Testing: Try business concepts and designs without major financial risk.
Practical Advantages
Work on Your Schedule: Create custom shirts whenever inspiration strikes or orders come in.
Family-Friendly Activity: Engage kids and family members in fun, creative projects.
Emergency Solutions: Handle last-minute needs for events, gifts, or special occasions.
Skill Development: Learn valuable techniques that can grow into profitable expertise.
Essential Equipment for Home T-Shirt Making
Heat Application Equipment
Heat Press Options:
- Professional Heat Press ($150-400): Consistent temperature and pressure for best results
- Easy Press or Compact Units ($100-200): Space-saving options perfect for home use
- Household Iron ($20-50): Budget-friendly starter option, though less consistent
Key Features to Consider:
- Temperature range up to 400°F for various transfer types
- Even heat distribution across the entire plate
- Adjustable pressure settings for different materials
- Timer function for consistent application times
Design and Cutting Tools
Design Creation:
- Computer or tablet with internet access for design software
- Free design platforms like Canva, GIMP, or online design tools
- Measuring tools for proper sizing and placement
Cutting Equipment:
- Cutting Machines (Cricut, Silhouette $150-300): Precise cuts for vinyl work
- Manual Tools: Sharp scissors, craft knives, rulers for simple projects
- Weeding Tools: Essential for removing excess vinyl material
Quality Control and Safety Items
Application Accessories:
- Teflon sheets or parchment paper to protect designs
- Heat-resistant gloves for safe handling
- Alignment guides and measuring tapes
- Good lighting for precise work
Storage Solutions:
- Flat storage for transfer materials
- Organized space for tools and supplies
- Climate-controlled area to maintain material quality
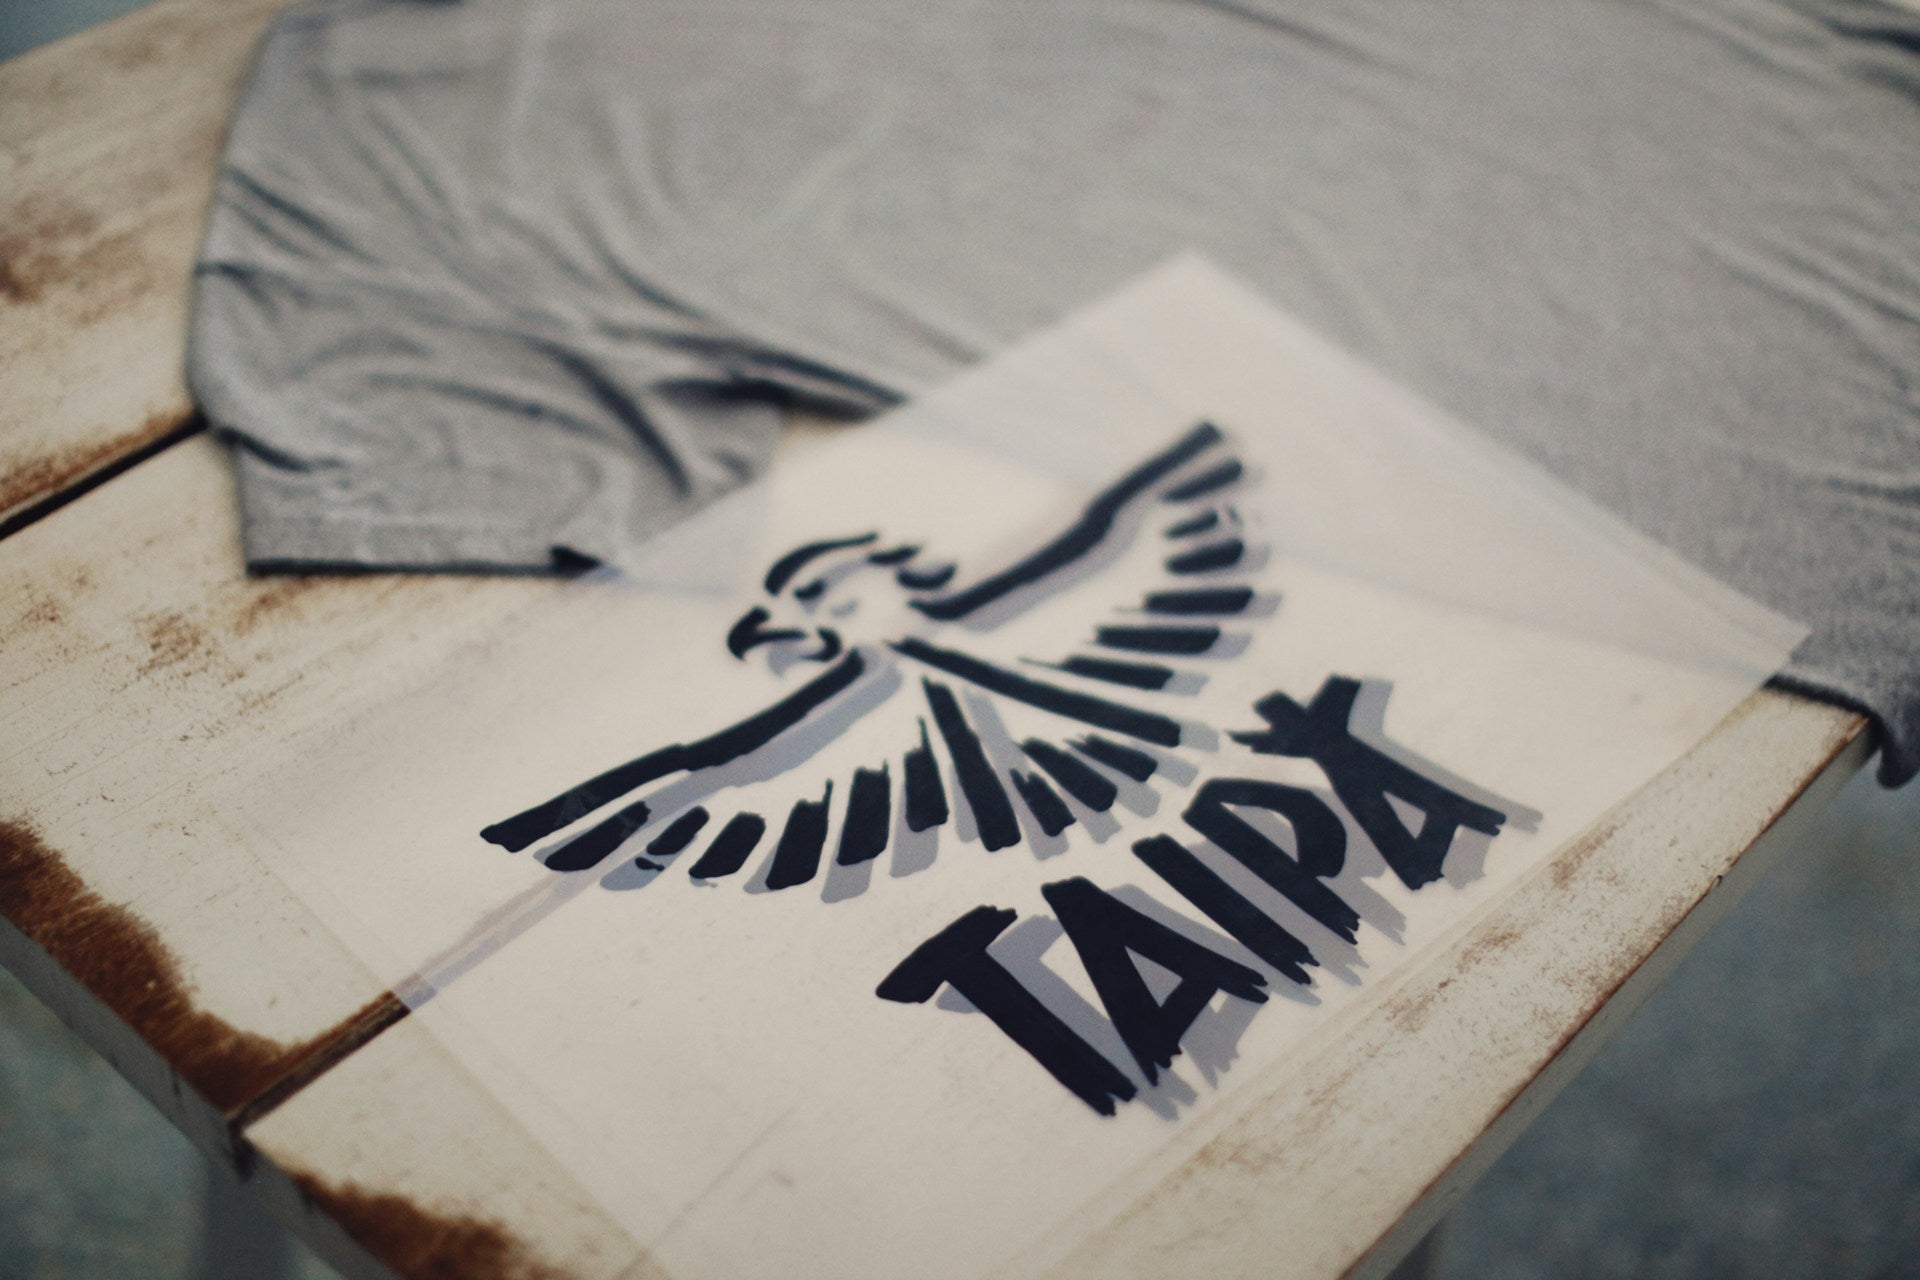
Method 1: Heat Transfer Vinyl (HTV) - Durable and Professional
Heat Transfer Vinyl creates long-lasting, flexible designs that maintain their appearance through countless washes. This method excels for text, logos, and bold graphics with solid colors.
Understanding HTV Options
Standard Vinyl Types:
- Matte and Gloss Finishes: Classic looks for everyday designs
- Glitter and Metallic: Eye-catching options for special occasions and fashion
- Holographic and Special Effects: Unique finishes that change with light and movement
- Stretch and Performance: Designed specifically for athletic wear and active use
Complete HTV Application Process
Preparation and Cutting:
- Create your design using vector graphics or text
- Size appropriately for shirt placement and visual impact
- Cut design from HTV material (colored side down in cutting machine)
- Weed away excess vinyl, leaving only your intended design
- Use transfer tape if design has multiple small pieces
Professional Application Technique:
- Pre-press shirt to remove moisture and wrinkles
- Position weeded design using alignment guides for precision
- Cover with protective sheet (Teflon or parchment paper)
- Apply heat according to vinyl specifications (typically 305-320°F)
- Use firm, even pressure for recommended time (usually 10-15 seconds)
- Remove carrier sheet according to manufacturer instructions (hot or cold peel)
Advanced HTV Techniques
Multi-Layer Designs:
- Plan color layering order (lighter colors typically go down first)
- Use registration marks for perfect alignment of multiple colors
- Allow each layer to cool completely before adding the next
- Consider final design thickness for comfort and durability
Text and Typography Tips:
- Choose fonts thick enough for clean cutting and easy weeding
- Avoid overly intricate details that are difficult to remove excess material
- Consider reading direction and appropriate letter spacing
- Test cut small samples before committing to full designs
Cost Expectations: Typically $3-6 per shirt depending on design complexity and vinyl type.
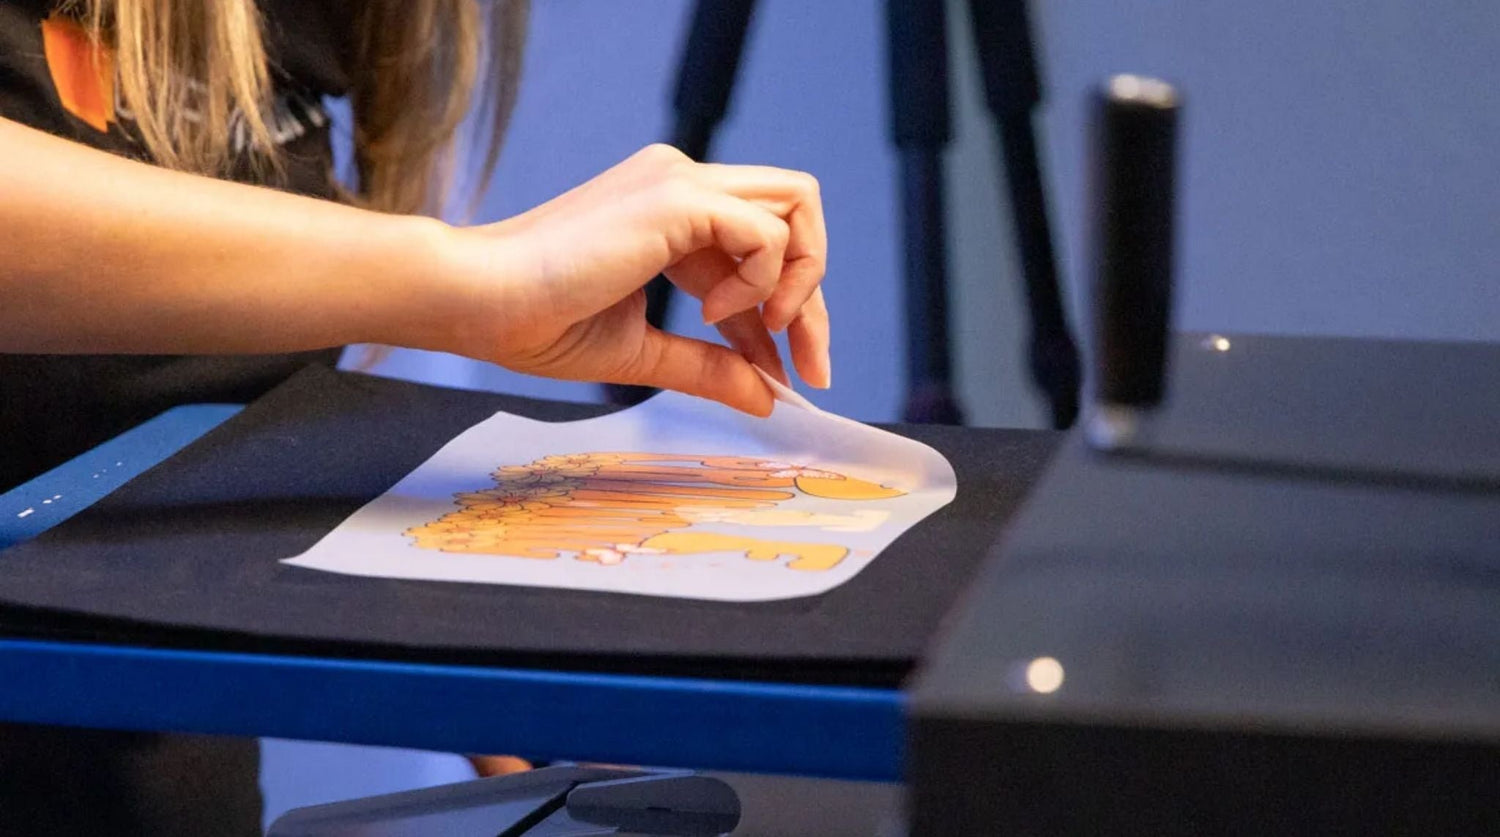
Method 2: DTF (Direct-to-Film) Transfers - Professional Quality Results
DTF transfers bring commercial-quality results to home crafters, offering vibrant colors, fine detail reproduction, and compatibility with virtually any fabric type. These pre-made transfers are ready to apply with just heat and pressure.
Why DTF Excels for Home Use
Superior Quality Benefits:
- Vibrant, detailed prints that rival expensive commercial methods
- Works perfectly on cotton, polyester, blends, and performance fabrics
- Excellent opacity and color vibrancy on both light and dark garments
- Fine detail reproduction that other methods cannot achieve
Convenience Advantages:
- No design limitations - any artwork can become a transfer
- Ready-to-apply format eliminates complex preparation steps
- Store unused transfers for future projects
- Consistent results across different fabric types and colors
DTF Application Process
Preparation Steps:
- Ensure heat press can reach and maintain 320°F consistently
- Pre-press garment for 3-5 seconds to remove moisture and wrinkles
- Position DTF transfer face-down on desired location
- Use measuring tools for precise placement and professional appearance
Heat Application Technique:
- Cover transfer with protective Teflon sheet or parchment paper
- Apply heat at 320°F with medium-firm pressure for 10-12 seconds
- Remove heat source but maintain pressure for 2-3 additional seconds
- Allow to cool for 10-15 seconds before handling
Finishing Steps:
- Carefully peel away transfer film - it should release easily when properly applied
- Cover printed area and press again for 5 seconds to fully cure the transfer
- Allow garment to cool completely before wearing, folding, or packaging
DTF Quality and Longevity
Maximizing Transfer Life:
- Follow temperature and timing specifications exactly
- Ensure even pressure distribution across entire design area
- Allow proper cooling time before removing transfer film
- Store unused transfers in cool, dry conditions away from direct sunlight
Customer Care Instructions:
- Wash inside-out in cold water to protect the design
- Use mild detergents without bleach or fabric softeners
- Tumble dry on low heat or hang dry for best longevity
- Avoid ironing directly on the printed area
Cost Expectations: Approximately $4-8 per shirt depending on design size and complexity.
Method 3: Sublimation Transfers - Vibrant and Permanent
Sublimation creates vibrant, permanent designs that become part of the fabric itself. These transfers work specifically with polyester garments and poly-coated items, offering unmatched color brilliance and durability.
When to Choose Sublimation
Ideal Applications:
- Athletic and performance wear requiring frequent washing
- All-over print designs that cover large areas
- Vibrant, photographic designs with many colors
- Items that need maximum wash durability
Fabric Requirements:
- Works best on white or light-colored polyester (65% minimum)
- Performance fabrics and moisture-wicking materials
- Poly-blend shirts with high synthetic content
- Specialty polyester items like mouse pads and mugs
Sublimation Application Process
Equipment Setup:
- Heat press must reach 400°F for proper sublimation activation
- Use substantial pressure - more than other transfer methods
- Ensure even heat distribution across entire design area
- Prepare heat-resistant tape to secure transfer during application
Application Steps:
- Pre-press garment to eliminate moisture and wrinkles
- Position sublimation transfer face-down on item
- Secure edges with heat-resistant tape to prevent shifting
- Apply 400°F heat with heavy pressure for 45-60 seconds
- Remove immediately and peel transfer while hot
Sublimation Quality Characteristics
Unique Benefits:
- Colors are more vibrant than any other transfer method
- Design becomes permanent part of the fabric
- No texture difference - print area feels identical to unprinted fabric
- Unlimited wash durability without fading, cracking, or peeling
Considerations:
- Limited to light-colored, high-polyester content materials
- Requires higher heat and pressure than other methods
- Works best with specific fabric types and colors
Cost Expectations: $5-10 per transfer depending on size and color complexity.
Method 4: Iron-On Transfer Paper - Budget-Friendly and Accessible
Transfer paper offers the most accessible entry into custom t-shirt making, requiring only basic equipment that most people already own while still producing quality results.
When Transfer Paper Works Best
Perfect Applications:
- Photo transfers and family portraits
- Full-color artwork and detailed graphics
- One-time gifts and personal projects
- Quick solutions for immediate needs
- Testing designs before investing in other methods
Application Process for Transfer Paper
Preparation and Positioning:
- Pre-iron shirt to remove wrinkles and moisture
- Position transfer face-down on desired location
- Use measurements for professional placement
- Cover with parchment paper or protective sheet
Iron Application Technique:
- Set the iron to the cotton setting with no steam
- Apply firm, even pressure using circular overlapping motions
- Iron for 25-30 seconds, ensuring all areas receive equal heat
- Let cool slightly before carefully peeling backing paper
Quality Tips:
- Use high-quality transfer paper designed for your fabric type
- Allow sufficient cooling time before removing the backing
- Apply firm, consistent pressure for best adhesion
- Follow manufacturer's specific instructions for best results
Cost Expectations: $2-4 per shirt, including transfer paper and basic cotton tee.
Choosing Quality Blank Garments
Fabric Type Considerations
100% Cotton Benefits:
- Soft, comfortable feel that customers love
- Breathable and natural fiber properties
- Works with most transfer methods
- Classic choice for casual and promotional wear
Cotton/Polyester Blends:
- Durable and wrinkle-resistant properties
- Good for items requiring frequent washing
- Balanced performance across different transfer methods
- Cost-effective option for bulk projects
Performance and Specialty Fabrics:
- Moisture-wicking properties for athletic applications
- Specialized treatments for specific end uses
- Higher price point but enhanced functionality
- Requires compatible transfer methods
Quality Indicators to Look For
Construction Quality:
- Pre-shrunk fabrics prevent size changes after first wash
- Reinforced seams ensure durability through multiple wears
- Consistent sizing across different colors and production runs
- Higher thread count typically indicates a softer feel and better appearance
Color and Finish:
- Even, consistent coloration without streaking or blotching
- Colorfast properties that won't fade or bleed in washing
- Appropriate fabric weight for intended use
- Professional appearance suitable for retail or gifts
Design Principles for Outstanding Results
Creating Effective Artwork
Visual Impact Guidelines:
- Use high contrast for maximum readability and appeal
- Size designs appropriately for shirt placement and viewing distance
- Consider fabric color when selecting design colors
- Balance detailed areas with open space for a professional appearance
Technical Specifications:
- Ensure artwork resolution meets transfer method requirements
- Use vector formats when possible for crisp, scalable designs
- Test color reproduction on actual fabric samples
- Consider how design will look after application and washing
Typography and Text Best Practices
Readability Factors:
- Choose fonts appropriate for your chosen application method
- Ensure text size remains readable from typical viewing distances
- Avoid overly thin lines that may not reproduce well
- Test small samples of intricate fonts before full production
Layout and Composition:
- Follow design principles like the rule of thirds for balanced layouts
- Leave appropriate margins from seams, edges, and existing design elements
- Consider how the shirt fit affects design placement and appearance
- Create visual hierarchy to guide viewer attention
Building Your Home T-Shirt Business
Starting Smart and Small
Initial Focus Strategy:
- Master one transfer method completely before expanding
- Start with designs and products you're passionate about
- Focus on quality over quantity in early projects
- Build skills and confidence with personal projects before taking orders
Market Research and Testing:
- Research local competition and pricing structures
- Test market interest with friends, family, and social media
- Start with proven popular designs before creating original artwork
- Collect feedback and adjust based on customer responses
Business Development and Growth
Building Customer Base:
- Showcase work through social media platforms
- Participate in local craft fairs and community events
- Develop referral programs to encourage word-of-mouth marketing
- Create sample books and portfolio pieces for potential customers
Operational Excellence:
- Develop consistent workflows for efficiency and quality
- Create detailed procedures for each step of your process
- Maintain accurate records of costs, time, and customer preferences
- Invest in quality control measures to ensure customer satisfaction
Pricing and Profitability
Cost Analysis Framework:
- Calculate material costs, including transfers, blanks, and supplies
- Factor in your time for design, application, and finishing work
- Include overhead costs like equipment depreciation and utilities
- Add appropriate profit margin for sustainable business growth
Competitive Positioning:
- Research local market pricing for similar products
- Position based on quality, service, or unique design capabilities
- Consider value-added services like design consultation or rush orders
- Develop pricing tiers for different service levels or order quantities
Quality Control and Customer Satisfaction
Consistent Results Every Time
Process Documentation:
- Record successful settings and procedures for each method
- Create checklists to ensure consistent application technique
- Document troubleshooting solutions for common issues
- Maintain samples of successful work for reference and quality comparison
Quality Inspection Protocol:
- Inspect every completed item before packaging or delivery
- Check for proper adhesion, alignment, and overall appearance
- Address any quality issues immediately and completely
- Maintain high standards regardless of order size or customer
Customer Communication Excellence
Setting Expectations:
- Provide realistic turnaround times and stick to commitments
- Explain care instructions clearly for maximum product life
- Show samples of similar work to ensure customer understanding
- Address questions and concerns promptly and professionally
Follow-Up and Service:
- Check customer satisfaction after delivery
- Provide additional care instructions or support as needed
- Address any issues quickly with appropriate solutions
- Use feedback to continuously improve your processes and offerings
Troubleshooting Common Application Issues
Heat Transfer Problems and Solutions
Adhesion Issues:
- Poor Sticking: Usually indicates insufficient heat, pressure, or time
- Partial Peeling: Often caused by uneven pressure or contaminated fabric
- Complete Failure: May indicate incorrect temperature or incompatible materials
Visual Quality Problems:
- Uneven Appearance: Typically results from inconsistent heat or pressure
- Color Issues: May indicate transfer quality problems or incorrect application
- Texture Problems: Often caused by excessive heat or inappropriate materials
Prevention and Best Practices
Preparation Excellence:
- Always pre-press garments to remove moisture and sizing
- Work in well-lit areas for accurate placement
- Use measuring tools and guides for consistent positioning
- Keep work surfaces clean and free from debris
Application Consistency:
- Follow manufacturer's specifications exactly for time and temperature
- Use consistent pressure and technique across all projects
- Allow proper cooling time before handling or packaging
- Document successful settings for future reference
Your Path to Custom T-Shirt Success
Making custom t-shirts at home combines creativity, technical skill, and entrepreneurial opportunity in a uniquely rewarding way. Whether you're creating personal items, building a side business, or developing a full-time venture, success comes from dedication to quality and continuous improvement.
Foundation Principles:
- Quality Focus: Invest in good materials and perfect your application techniques
- Customer Orientation: Always consider the end user's experience and satisfaction
- Continuous Learning: Stay updated on new methods, materials, and design trends
- Professional Standards: Treat every project with care and attention to detail
The custom apparel market continues to expand as consumers seek personalized products and unique expressions of identity. By developing solid home application skills and maintaining high-quality standards, you're positioning yourself to meet this growing demand while enjoying the satisfaction of creating something tangible and valuable.
Getting Started Action Steps:
- Choose one method that matches your current skills and interests
- Practice with personal projects to build confidence and expertise
- Document your successful processes for consistency
- Gradually expand capabilities as you gain experience
Remember that every successful custom apparel business started with someone's first homemade shirt. Focus on making that first one exceptional, and success will naturally follow as you build skills, reputation, and customer base.
Ready to begin your custom t-shirt journey? Florida DTF Factory offers high-quality DTF transfers, premium vinyl materials, and all the supplies you need to create professional results at home. Let's help you transform your creative vision into beautiful, durable custom apparel that you'll be proud to wear or sell.

Leave a comment
This site is protected by hCaptcha and the hCaptcha Privacy Policy and Terms of Service apply.